

vpn
要下载一些工具,可能需要登录到到github等网站,所以首先介绍翻墙工具。这里仅仅介绍免费的cloudflare提供的翻墙工具cloudflare-warp。打开https://1.1.1.1。
这个网站就提供了一些cloudflare工具的下载,本篇博客介绍的是ubuntu下的工作优化,所以下载linux下的工具,按照提示,使用命令:
# Add cloudflare gpg key
curl -fsSL https://pkg.cloudflareclient.com/pubkey.gpg | sudo gpg --yes --dearmor --output /usr/share/keyrings/cloudflare-warp-archive-keyring.gpg


# Add this repo to your apt repositories
echo "deb [signed-by=/usr/share/keyrings/cloudflare-warp-archive-keyring.gpg] https://pkg.cloudflareclient.com/ $(lsb_release -cs) main" | sudo tee /etc/apt/sources.list.d/cloudflare-client.list


# Install
sudo apt-get update && sudo apt-get install cloudflare-warp
安装完成之后,按照文档的提示,进行下一步的命令,文档地址:
https://developers.cloudflare.com/warp-client/get-started/linux/
# Register the client
warp-cli registration new

# Connect
warp-cli connect

# Run the following and verify that warp=on
curl https://www.cloudflare.com/cdn-cgi/trace/
运行命令warp-cli connect就已经可以访问外网了,后面再确认一下warp=on就可以了。warp-cli还有其它命令,查阅文档即可。
zsh
zsh拥有比bash更加强大的命令行系统,而且比bash要更加好操作一些。
使用命令sudo apt install zsh即可下载安装zsh。完毕后,使用zsh --version来查看zsh的版本。
我们可能希望将zsh设置成默认的shell,系统的默认shell一般是bash,尝试运行chsh -s $(which zsh),有时这个命令可能不管用,那么我们可以在bash的配置文件.bashrc末尾中添加exec zsh来强制让shell打开zsh,实际上是先启动了bash,再通过bash启动zsh。
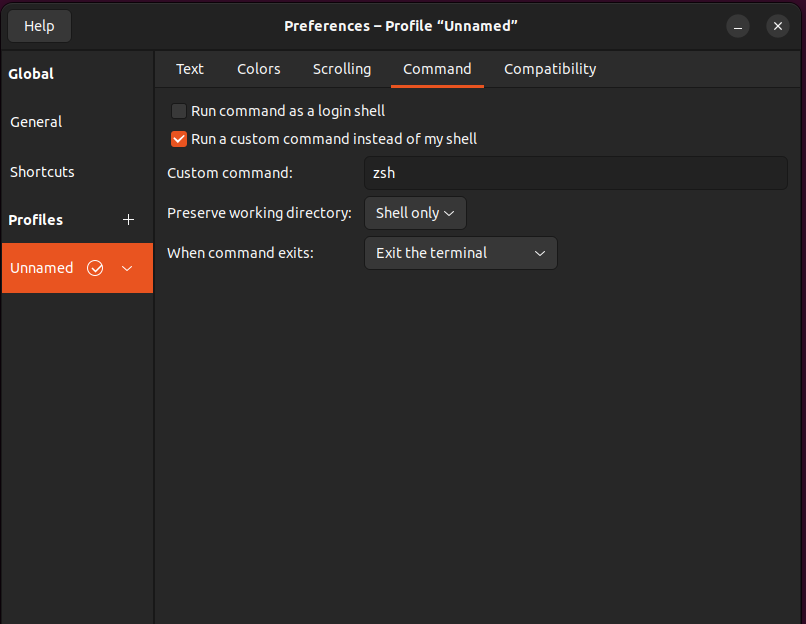
顺带一提的是,如果使用的ubuntu的默认terminal,可以在shell的右上角的Preference设置中添加自定义命令,效果其实等同于在.bashrc中添加exec zsh。
oh-my-zsh
仅仅有一个zsh,当然不太够,但是zsh的好处在于它有比bash更加好的灵活性,所以它会有很多插件和工具,几乎必备的工具就是oh-my-zsh。
github地址:
https://github.com/ohmyzsh/ohmyzsh
按照github首页的提示,运行下面的命令(任选其一)即可:
# curl
sh -c "$(curl -fsSL https://raw.githubusercontent.com/ohmyzsh/ohmyzsh/master/tools/install.sh)"

# wget
sh -c "$(wget -O- https://raw.githubusercontent.com/ohmyzsh/ohmyzsh/master/tools/install.sh)"

# fetch
sh -c "$(fetch -o - https://raw.githubusercontent.com/ohmyzsh/ohmyzsh/master/tools/install.sh)"
运行完毕之后,会出现下面的输出,代表安装完成。
         __                                     __
  ____  / /_     ____ ___  __  __   ____  _____/ /_
 / __ \/ __ \   / __ `__ \/ / / /  /_  / / ___/ __ \
/ /_/ / / / /  / / / / / / /_/ /    / /_(__  ) / / /
\____/_/ /_/  /_/ /_/ /_/\__, /    /___/____/_/ /_/
                        /____/                       ....is now installed!


Before you scream Oh My Zsh! look over the `.zshrc` file to select plugins, themes, and options.
oh-my-zsh内置了许多美化主题,默认的主题robbyrussell不一定适合所有人的审美,可以在.zshrc中进行修改,博主本人最喜欢的主题是agnoster。但是要注意的是,我们这里主要使用的是oh-my-zsh的插件系统,外观美化由下方的starship负责。
nerdfont
要美化shell,一般推荐使用nerdfont,这是专门用于等宽字体,用在shell当中的美化字体。nerd-font首先在github上有页面:https://github.com/ryanoasis/nerd-fonts,也有专门的网站:https://www.nerdfonts.com
比较简单的方法是,在www.nerdfonts.com下载想要的字体压缩包,接着把压缩包解压得到的目录放到~/.local/share/fonts下。
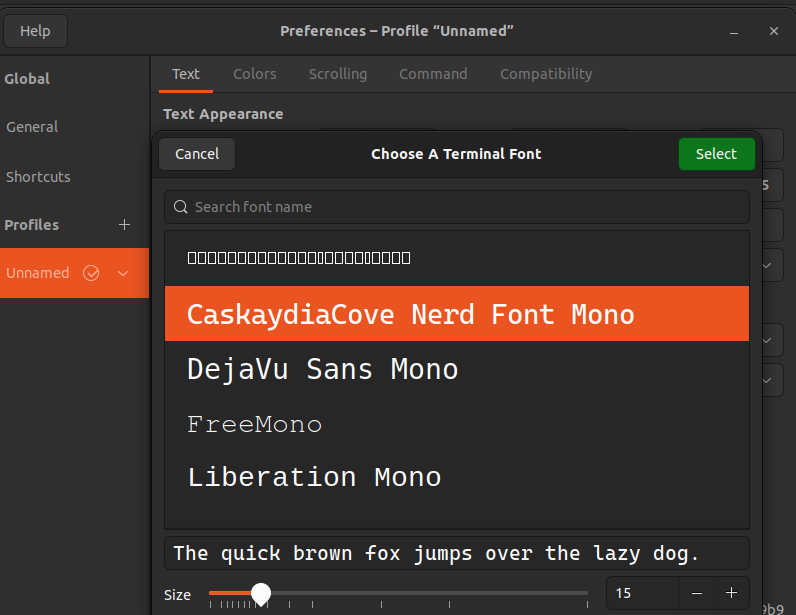
然后就可以尝试使用ubuntu的shell preference中,看到字体的选择,这里使用的是CaskaydiaCove
starship
除了oh-my-zsh的美化,更专业的美化就是starship,starship是跨平台的,也可以用在其它shell中,以下是它网站的demo视频。
starship也给了非常简单的安装方式,就是直接运行如下的命令:
curl -sS https://starship.rs/install.sh | sh
安装完毕后,在.zshrc最后写入下面的命令:
eval "($starship init zsh)"
这样,zsh以后使用的就是starship的美化方案。
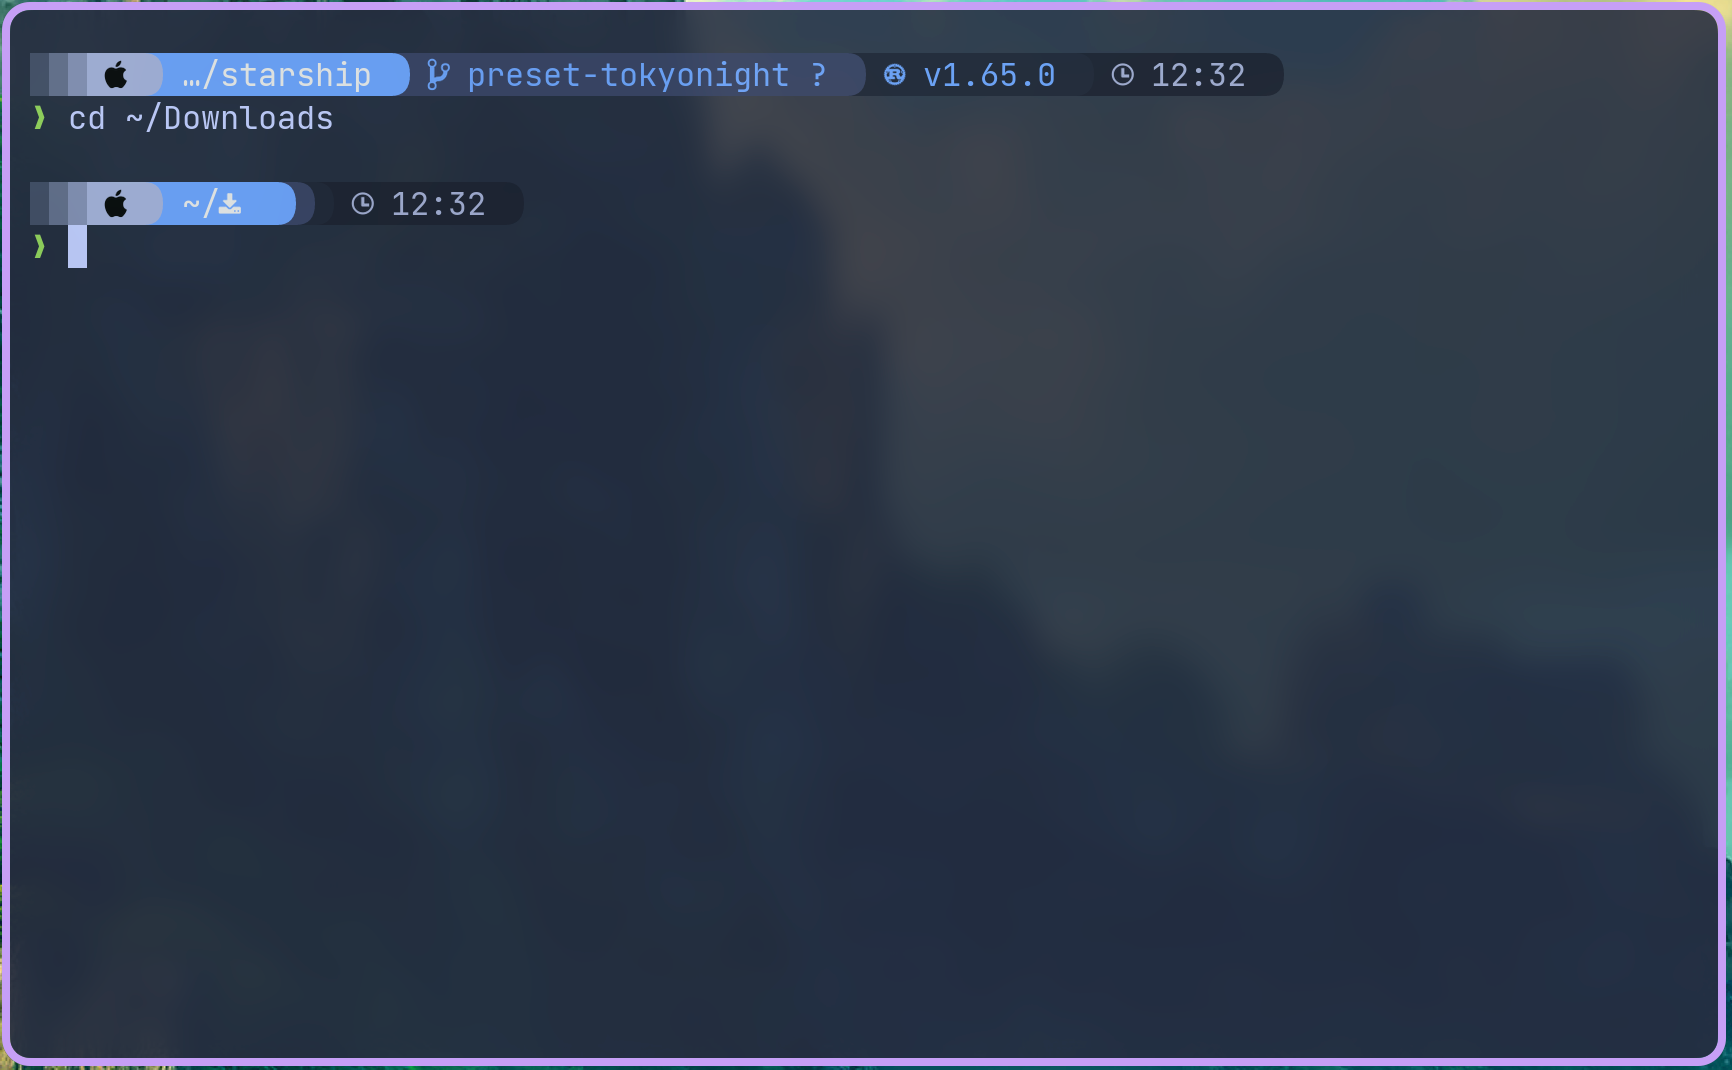
然后我们需要配置具体的美化方案,配置文件在~/.config/starship.toml,starship提供了很多预设的方案,在这个地址:https://starship.rs/presets/
例如,如果喜欢Tokyo Night这个主题,就可以点开对应的页面,这里也提供了命令:
starship preset tokyo-night -o ~/.config/starship.toml
这样就可以看到更加漂亮的界面了。
zsh-autosuggestion
注意,starship只是一个美化工具,它没有自动补全功能,不要被它网站上的视频误导了,starship视频里展示的是fish的自动补全功能,zsh里面的zsh-autosuggestion可以做到类似的功能。
github地址:
https://github.com/zsh-users/zsh-autosuggestions
先前已经安装了oh-my-zsh,这里就直接使用oh-my-zsh的插件系统,使用下面的命令:
git clone https://github.com/zsh-users/zsh-autosuggestions ${ZSH_CUSTOM:-~/.oh-my-zsh/custom}/plugins/zsh-autosuggestions
接着在.zshrc里的plugins加入zsh-autosuggestions即可,注意每个插件用空格隔开而不是逗号,而且注意末尾的s。
zoxide
zoxide是一个更加智能化的cd命令,看一下github页面上的demo:

安装也比较简单,按照github上的提示即可:
curl -sS https://raw.githubusercontent.com/ajeetdsouza/zoxide/main/install.sh | bash
在安装的时候,zoxide有时会提示你PATH的问题,因为zoxide不是安装在/usr/bin或者/usr/local/bin下的,而是安装在~/.local/bin下。
安装完之后,在.zshrc里面启用,我个人还喜欢直接利用alias把cd用z替换
eval "$(zoxide init zsh)"
alias cd=z